Showing posts with label DIY. Show all posts

Monday, July 15, 2013

before and after: chevron laundry room

A while back, I decided I should paint my laundry room.  That was about six years ago when I moved into my townhouse.  Fast forward to 2013...and I finally painted it and crossed it off my to do list.  Inspired by an uneven chevron pattern that I've been seeing everywhere (like the shower curtain below from Serena and Lily), I decided to use supplies I had in the garage (white paint, green paint, FrogTape, and a level) to make this free project.

[source]

Overall, it took me about three hours (plus dry time) to complete.  I decided to go with an uneven chevron for sanity purposes.  In order to make the pattern 100% perfect, it would have taken me about 10 hours to make...and then I would criticize it every time I saw it...and I'd freak out if anything happened to the wall.  Intentionally imperfect lines helps with my OCD.  

laundry room: before and after

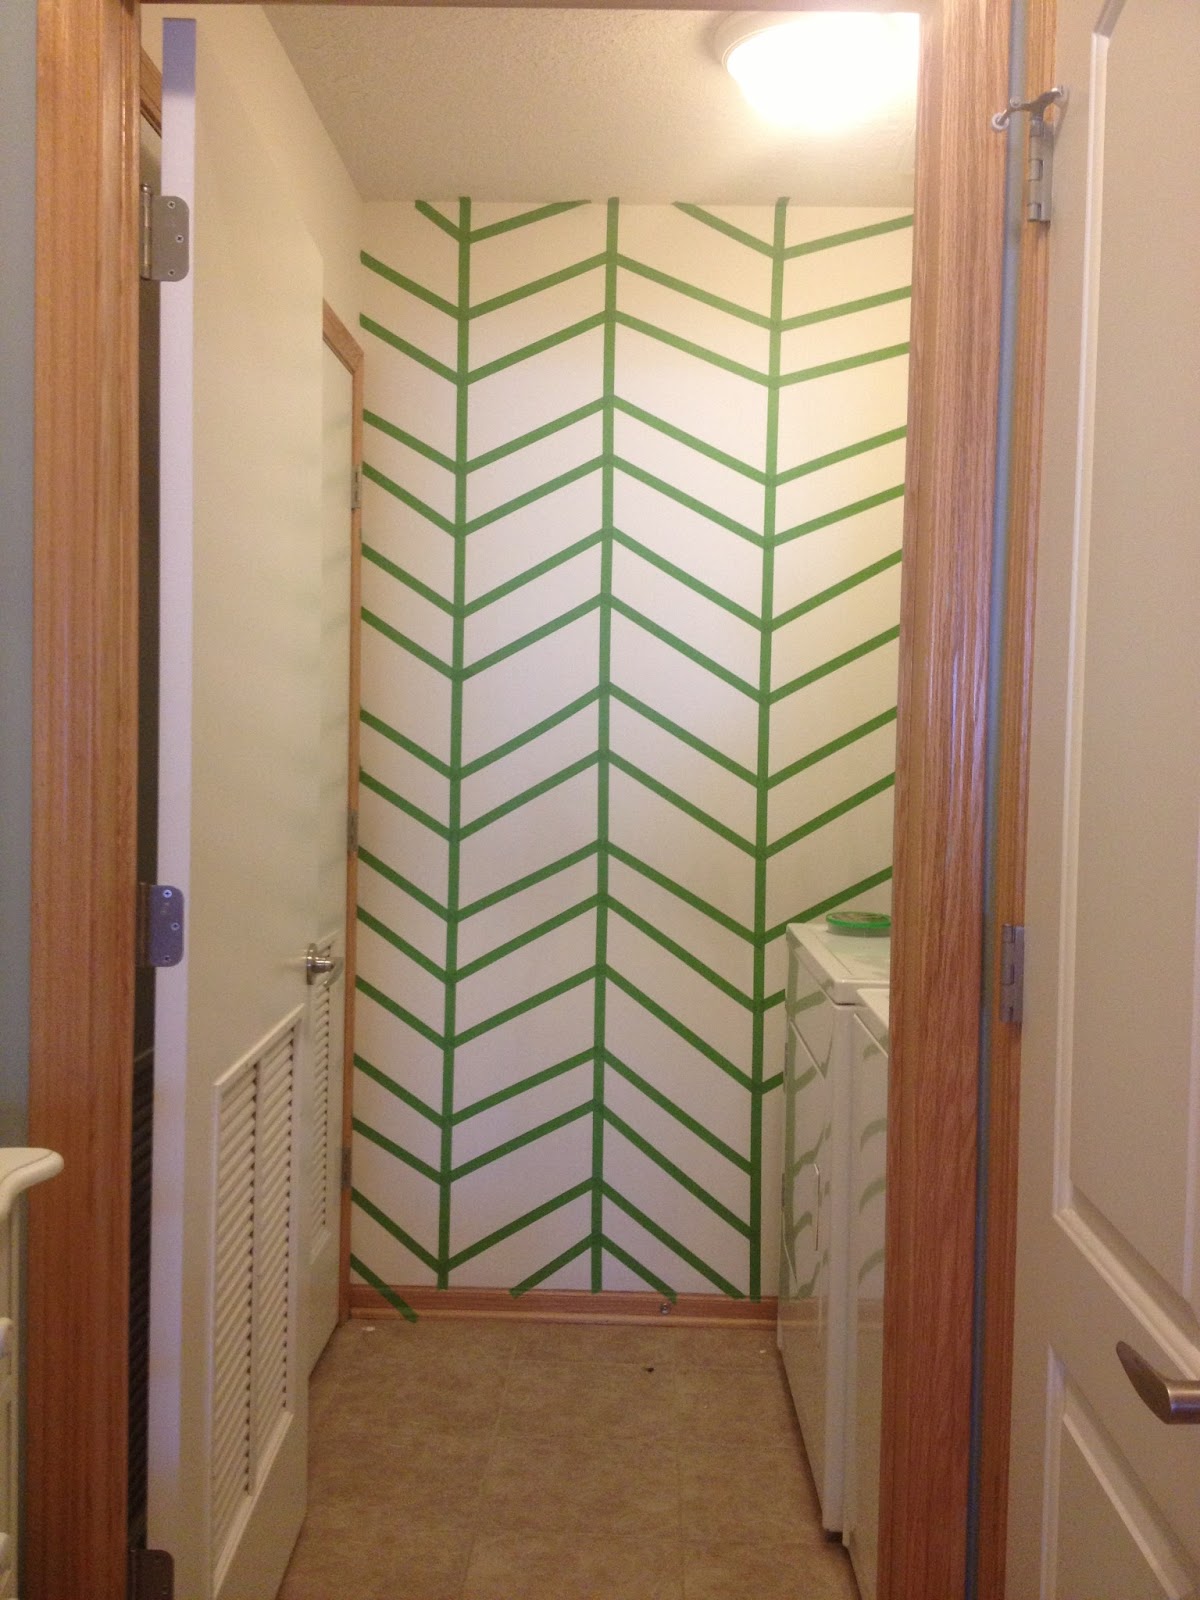
Now that it's painted, I realize no line is perfectly straight (and that's perfectly OK!).  I also didn't take the time to burnish the white (like this awesome video tutorial suggests).  I used FrogTape, but still had a little bit of bleeding.  And I didn't use a tape measure; instead, I used my 12" floor tiles as my guide and used a level to go up the wall.  When it came time to do the chevron, I eyeballed it working from chest level (first taping down to the floor, then got a ladder to tape up high).  Again, I didn't want anything to be perfect, so I didn't want to get out a tape measure.  

chevron taping in process (notice the uneven rows)

chevron taped wall ready for green paint


Once the tape was on the wall, painting the green took about an hour.  I painted over the tape lines using a paint brush first (to seal the tape to the white wall) and then rolled the whole wall (for an even paint job).  The brushing took the longest (about an hour); the rolling took about 5 minutes.

uneven chevron wall

One handy trick I used while painting (thanks to a tip I saw on Pinterest) was lining my paint tray with aluminum foil instead of using a paint tray.  It was a genius idea.  When I was done painting, I simply dumped out the unused paint back into the gallon bucket, and wrapped up the wet roller in the foil.  In the garbage they went without any mess at all!  If you have painting to do, line your tray with foil.  You won't regret it.

line your paint tray with aluminum foil

Overall, I'm thrilled with how it turned out.  I try to have a perfectly clean and tidy home that's photo ready 100% of the time...but let's be realistic.  I don't have a perfect laundry room.  Most of the time, the door is open and laundry is hanging to dry...or overflowing from the hamper.  Now, I have a lovely wall to look at when the door is open and the laundry is hanging to dry.

Once more, here's the before and the after shot of the laundry room.  I'm really happy with how it turned out.  And really happy that it didn't cost a thing (other than my afternoon).

before: boring laundry room

after: awesome laundry room

Friday, April 12, 2013

Put A Bird On It

I'm giving a presentation on watercolor tonight, so I whipped up this little piece of artwork this morning. (Nothing like a little last-minute prep.) I was a little worried about the colors blending, but the white crayon did a nice job of acting as a barrier. I might even hang this in my house when I get back home tomorrow.

Monday, March 25, 2013

Dining Room Makeover

I finally did it.  I hung some artwork, which means the dining room is officially finished (read more about the dining room here).  Picking out artwork and photos is a personal thing to me that takes time.  I'm happy with where I landed, but would be happy to add to the wall at some point.  As a wise woman once told me, "A good house is never done."

Dining Room: After
Dining Room: Before (2007)
 
I also hung two little pictures on the wall in the living room (thank you Instagram for making my pictures look cooler and FoxGram for printing them.  Once I get a hammer, I just can't help myself...


And, let's keep it real.  Here's a little behind-the-scenes action from these two shots.  I like to think I'm organized and I swear I am in my head...


Monday, November 26, 2012

Christmas Front Door

I did a little decorating tonight. After driving around almost the entire Des Moines metro area, I finally found a little (fresh) tree and some white lights for it. I planted the tree in a planter box I already had (this is what it looked like in the summer), which is conveniently located near an exterior outlet. I need to find a timer to put the lights on, but the only I ones I've found are $20, and I'm too cheap for that. The wreath is from about three years ago. I made it from crafty things at Michael's. The skeleton key door mat is from Target. I hope to get the rest of the front porch area decorated tomorrow. I love Christmas!

Sunday, November 11, 2012

Emily's DIY Baby Shower

Yesterday was Emily's baby shower, and I was thrilled to host it.  Ten girls (and three babies) were able to attend.  Spending the weekend with my closest college girlfriends (who also happen to be Kappas) was exactly what I needed.  The fact that we were celebrating Emily's baby (who we lovingly refer to as Bobby Roo) was just a bonus.

I tried to keep the shower simple.  In an effort to avoid having lots of plates, cups, utensils, etc. to clean afterward, I tried to keep the food simple.  Mixed berries in clear punch cups fit perfectly in the cupcake stand I borrowed from a co-worker.  Dessie, one of the guests, brought the homemade chocolate cupcakes.  Jessica brought the veggie tray.  Michaun made the food for the favors - puppy chow with M&Ms.  It was a group effort, and everything came together beautifully.


Favors - puppy chow with M&Ms

Chocolate cupcakes with cream cheese frosting

Fruit cups


Michaun and I prepared two games for the baby shower.  The first one was a Baby Gender Name Game.  We looked up the top gender-neutral baby names from here and here, and made a list of our favorite top 20 names.  Then, we read the names one by one, and Emily decided whether she thought the name would be best for a boy or a girl by holding up either the pink lips or a girl or the blue mustaches or a boy.

Props for the Baby Gender Name Game

Action shot during the Baby Gender Name Game

The second game was baby jeopardy.  We got the idea here.  Michaun and I researched newborn baby facts and learned lots of fun facts here (like newborns sleep for about 16 hours a day, and they have more taste buds than their moms).  Then, we put together some questions and answers about Emily and Frank.  It was quite fun putting the games together and playing them with the guests.

Baby Jeopardy Game

Emily asked for hand-me-down and handmade gifts (though she still registered at Babies"R"Us and Pacifier), and I think everyone had fun putting together thoughtful gifts.  My friend Jennifer from thread made this adorable onesie for the baby.  I love the tiny little elephant, and so did Emily!

Handmade onesie from thread
The whole group

For old-times sake, we had to take a belly heart photo.  About a year ago, we took a funny photo of Heather's belly with Emily and I making a heart with our hands on her belly.  So, of course we had to do the same with Emily's baby bump.  Bobby Roo, we can't wait to meet you!

Baby Shower Sources
Tablecloth fabric: JoAnn Fabric
Cupcake stands: borrowed, but here is a similar option from Crate & Barrel
Favor bags: TJ Maxx
Yellow ribbon, mini forks, and tissue poms: Hobby Lobby

See a preview of Emily's baby shower here.
See Emily's baby shower invitations here.

Saturday, November 3, 2012

Babies, Babies, Everywhere

Next weekend, I'm hosting a baby shower for Emily.  I'm super pumped and can't wait to shower her with love (and lots of food).  I made her baby shower invitations on a whim one Monday night with nearly all supplies I had on hand, spending only $8 at Archiver's on three sheets of scrapbook paper and a white pen (some of my leftover envelopes from a past Christmas card were dark gray, so the white pen was for addressing them).  Here's a quick shot of them.  I love how they turned out (Lavanderia and Century Gothic are my go-to fonts currently) and can't wait to put together all the things I want to do for her shower. 

DIY baby shower invitations


Per Emily's request, I am not going crazy on this shower.  The invites literally took me about three hours to make from concept to completion.  I'm really trying to stay simple, and incorporate things I already have or borrow from some of my resourceful friends.  I've been stashing away lots of great ideas on my Pinterest baby shower board, but here are a few I'm loving.

(source)


(source)


(source)


And in other news, we found out last week Josh's sister is preggers!  Yesterday, I got to spend the day shopping with her for maternity clothes, and talking about some nursery things.  I'm so excited to be an auntie again - I'm a REALLY good auntie!  May 5, 2013 can't come soon enough!

Thursday, November 1, 2012

Fab Finds: Easy Holiday Decorating Ideas

Thanksgiving and Christmas are almost here!  I love the holidays - food, family, pretty decorations - it really doesn't get much better than that!  Here are some of my favorite easy holiday decorating ideas this year (and yes, I'll even be making a couple of them).

(source)
(source)
(source)
(source)
(source)
(source)