A while back, I decided I should paint my laundry room. That was about six years ago when I moved into my townhouse. Fast forward to 2013...and I finally painted it and crossed it off my to do list. Inspired by an uneven chevron pattern that I've been seeing everywhere (like the shower curtain below from Serena and Lily), I decided to use supplies I had in the garage (white paint, green paint, FrogTape, and a level) to make this free project.
Overall, it took me about three hours (plus dry time) to complete. I decided to go with an uneven chevron for sanity purposes. In order to make the pattern 100% perfect, it would have taken me about 10 hours to make...and then I would criticize it every time I saw it...and I'd freak out if anything happened to the wall. Intentionally imperfect lines helps with my OCD.
 |
| laundry room: before and after |
Now that it's painted, I realize no line is perfectly straight (and that's perfectly OK!). I also didn't take the time to burnish the white (
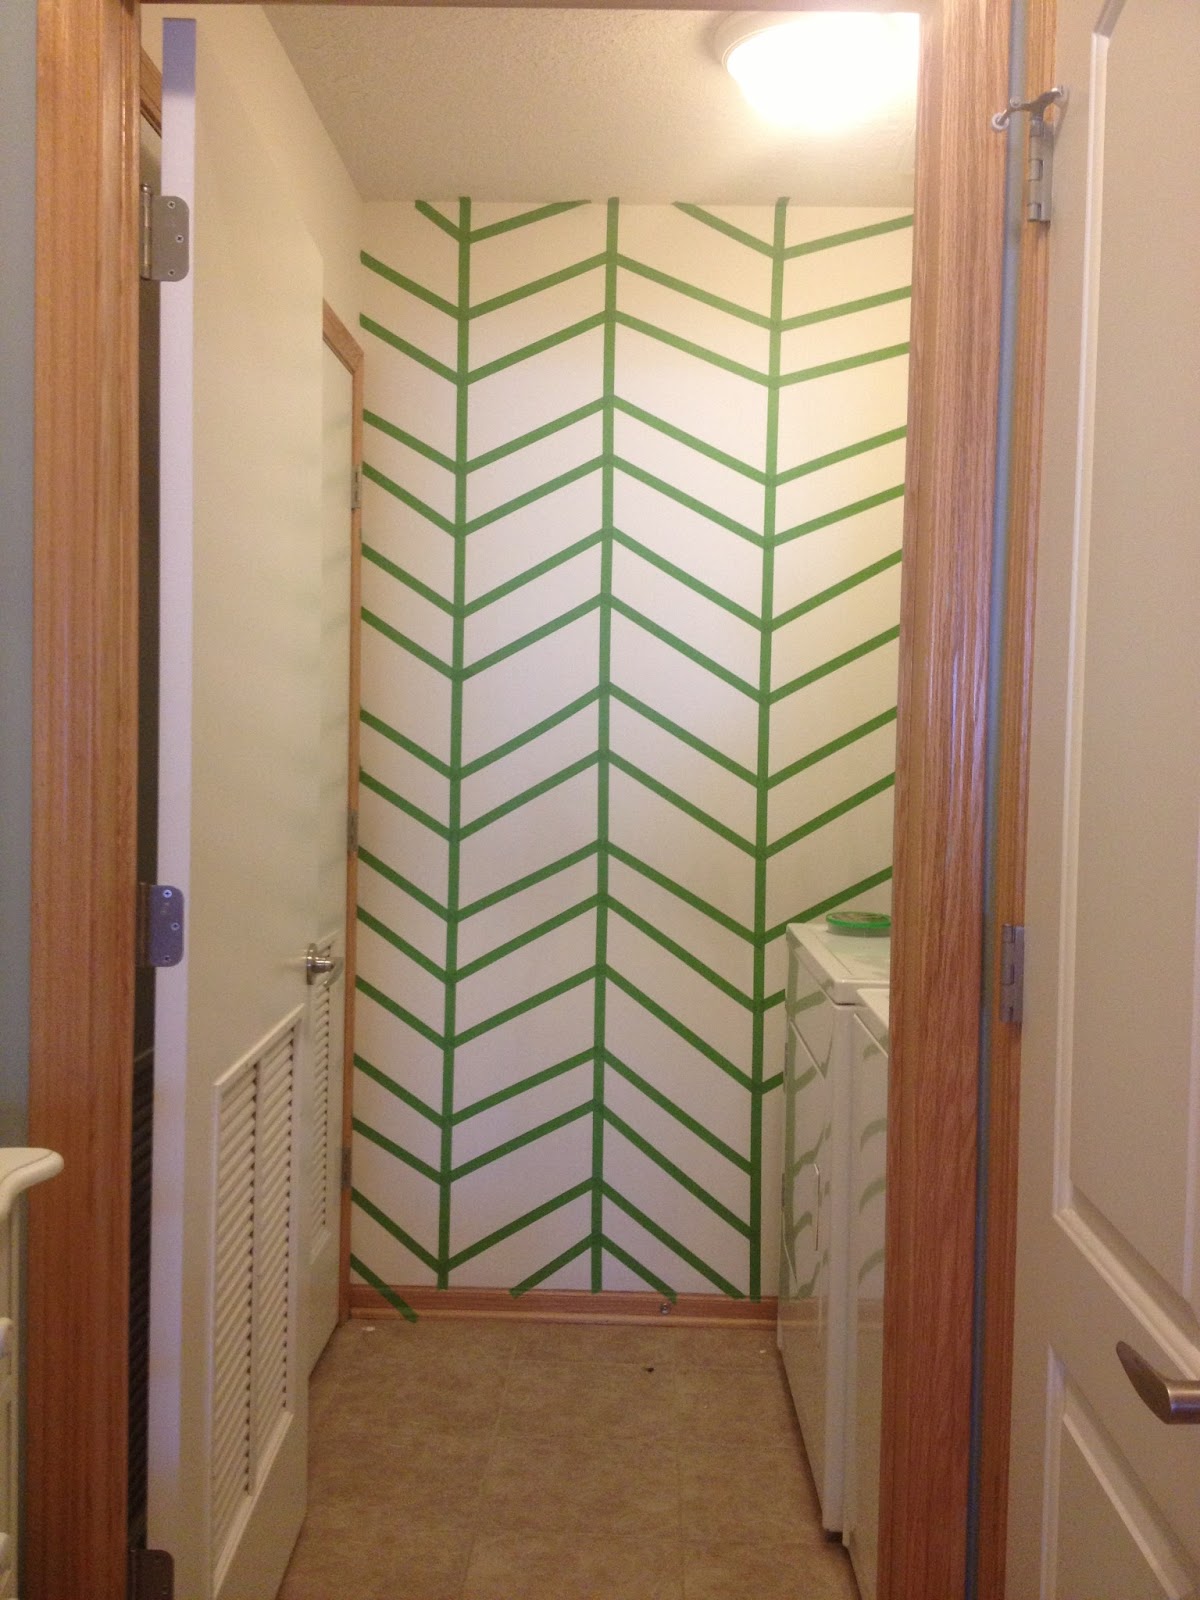
like this awesome video tutorial suggests). I used FrogTape, but still had a little bit of bleeding. And I didn't use a tape measure; instead, I used my 12" floor tiles as my guide and used a level to go up the wall. When it came time to do the chevron, I eyeballed it working from chest level (first taping down to the floor, then got a ladder to tape up high). Again, I didn't want anything to be perfect, so I didn't want to get out a tape measure.
 |
| chevron taping in process (notice the uneven rows) |
 |
| chevron taped wall ready for green paint |
Once the tape was on the wall, painting the green took about an hour. I painted over the tape lines using a paint brush first (to seal the tape to the white wall) and then rolled the whole wall (for an even paint job). The brushing took the longest (about an hour); the rolling took about 5 minutes.
 |
| uneven chevron wall |
One handy trick I used while painting (thanks to a
tip I saw on Pinterest) was lining my paint tray with aluminum foil instead of using a paint tray. It was a genius idea. When I was done painting, I simply dumped out the unused paint back into the gallon bucket, and wrapped up the wet roller in the foil. In the garbage they went without any mess at all! If you have painting to do, line your tray with foil. You won't regret it.
 |
| line your paint tray with aluminum foil |
Overall, I'm thrilled with how it turned out. I try to have a perfectly clean and tidy home that's photo ready 100% of the time...but let's be realistic. I don't have a perfect laundry room. Most of the time, the door is open and laundry is hanging to dry...or overflowing from the hamper. Now, I have a lovely wall to look at when the door is open and the laundry is hanging to dry.
Once more, here's the before and the after shot of the laundry room. I'm really happy with how it turned out. And really happy that it didn't cost a thing (other than my afternoon).
 |
| before: boring laundry room |
 |
| after: awesome laundry room |